Thursday, December 15, 2011

New Items in Clearance Rack

Click the SHOP  button now to go to my Stampin Up Website

Dates: December 15, 2011-January 5, 2012
Details:
Nearly 200 new Clearance Rack items are being added to the Online Store at discounts up to 80 percent off retail--while supplies last!

Happy Shopping!!!!

Monday, December 12, 2011

Christmas Tags - Pool Party Frost White Shimmer

This is the 3rd tag and one of my favs.  I love the Pool Party color and more Frost White Shimmer.  The tag base is Natural White cs.  The shimmer was applied using crumpled up plastic wrap, then sponged Pool Party and Soft Suede ink over it.  Applied 2 way glue to the outside of the bird and the center of the stamped Ornament image then added Dazzling Diamonds glitter, for that extra sparkle.

 The next tag is similar except I sponged the Frost White Shimmer paint over drywall tape then removed it.  I attached this one to a Naturals White card base and used some of the Spice Cake DSP for layering.

Please send me an email if you have any questions regarding these cards, or any of the items I post on my blog.
If you live in the Fort McMurray area and would like to come to one of my class please email me. I would love to show you how to have fun with ink, stamps and paper.

If you live in Canada you can purchase these products on my Stampin Up website HERE

Thanks for looking
Happy Stampin
~Louise

Saturday, December 10, 2011

Christmas Tags - Winter Post Ink Resist

This is the second in the tags we did at class.  I used the same colors in both but one had more of a gold tone.  For the gold I used Gold Lame Smooch and Champagne Mist Shimmer paint.
 The other tag used more of the Champagne Mist Shimmer Paint and some Cajun Craze ink.
We started with a Natural White base tag and stamped the images with Versamark and embossed with clear embossing powder.
Next we sponged using Soft Suede and Cajun Craze.  Depending on which color you wanted to be more dominate, they would turn out quite different.  Using the Soft Suede and Music Notes Wheel we did second generation image over the embossed tag.
For the large star we used the Crimper and inked with Sponge Daubers in color of choice.

If you live in the Fort McMurray area and would like to come to one of my class please email me. I would love to show you how to have fun with ink, stamps and paper.

If you live in Canada you can purchase these products on my Stampin Up website HERE

Thanks for looking


Happy Stampin
~Louise

Friday, December 9, 2011

Christmas Tags - Monochromatic

Well I'm almost ready for Christmas and have been busy with classes, but now they are finished until after the New Year.  Time to get my stuff done.
For our November/December classes we did tags that can be added to a card if you wanted.
Over the next few days I'll be posting the tags we did.
This is the first one, it is monochromatic with embossing and a little bling.
I did a second one and upped it some by adding some pearls and Crumb Cake seambinding.
Hope you like and will give them a try.
If you have any questions please send me an email and I will try to answer.
The colors used was Naturals White and Crumb Cake.

If you live in the Fort McMurray area and would like to come to one of my class please email me. I would love to show you how to have fun with ink, stamps and paper.

If you live in Canada you can purchase these products on my Stampin Up website HERE

Thanks for looking
Happy Stampin
~Louise

Thursday, December 8, 2011

Christmas at Our House

No card or stampin post today, but some Christmas decor photos.
I've had most of my Christmas decorating done for about 3 weeks and decided I would post a few.  
I love Christmas and what it's about...the birth of Jesus.  
This tree is the one in our living room.  I call this one my Angel tree.  Lots of different ones on there, from the lace ones I've made (which is quite a variety) to crystal, glass, whatever I saw or was given.  Love them all.
This next picture is a arrangement on the dinning room table.  Love the silver and white here, sitting on a table runner my mom made me last year.

My front entry done with mostly snowman and this year I decided to do a little less.  I always do a snowman tree in my Stampin/craft room, but this year was too crowded in there so just decorated the entry.  I think I need a bigger craft room for all my Needs....wants, and now with the new Occasions Mini starting in January, I will be crowded even more.  Gonna have to get a room built onto it....I wish, but I don't think that's going to happen.
Thanks for visiting and taking a look.
Wishing you all a Merry Christmas and remember The Reason for The Season!!!

If you live in the Fort McMurray area and would like to come to one of my class please email me. I would love to show you how to have fun with ink, stamps and paper.

If you live in Canada you can purchase Stampin Up products on my Stampin Up website HERE

Happy Stampin
~Louise

Monday, November 21, 2011

24-HOUR-ONLY DEALS DURING ONLINE EXTRAVAGANZA!


The Online Extravaganza, our annual sale to kick off the holiday shopping season, will begin Monday, November 21, 2011, and run through Wednesday, November 30, 2011.


Extravaganza 24-hour-only sale items will be available from November 21, 12:01 AM - 11:59 PM (MT).  Extremely limited-time deals! These special offers will not be extended past the deadline, so be sure to place your order with me or at my Stampin Up website HERE


Go to my Stampin Up website HERE on Monday, November 21, to take advantage of great savings, like FREE digital downloads valued at $42 when you buy My Digital Studio Express, 60 percent off select Designer Fabrics, and 30 percent off an exclusive ribbon bundle!


In addition, there will be two items on sale for 24 hours only (November 21, 12:01 AM – 11:59 PM [MT])—so make sure you don’t miss the first 24 hours of Online Extravaganza! 

Happy Stampin
Louise


Saturday, November 5, 2011

Beautiful Season

Another of the cards we did at the Stamp A Stack.  This set is so beautiful that it can be left without coloring.  Here I stamped the image in A.Artichoke and colored the berries with C.Cobbler marker.  The mat and and punched border is R.H.Red.   The sentiment is from Perfect Punches stamped in R.H.Red and punched using the 1 3/4" scallop circle.  I used the stripes from the Regals DSP and the bottom is A.Artichoke embossed with the Polka Dot EF.  This is mounted unto a Natural White card.

Hope you've started making your Christmas cards.
If you live in the Fort McMurray area and would like to come to one of my class please email me. I would love to show you how to have fun with ink, stamps and paper.

If you live in Canada you can purchase these products on my Stampin Up website HERE

Thanks for looking
Happy Stampin
~Louise

Friday, November 4, 2011

Christmas Lodge Stamp a Stack

Another one if the cards I did for Stamp A Stack.  Stamped the Lodge in Soft Suede on Natural White cs.  Used a piece of torn Frostwood Lodge DSP and mounted it unto Cherry Cobbler.  Using the postage stamp punch I punched out squares of G.Green and C.Cobbler, then cut in half diagonally and mounted together for the corner.  The branch with birds was stamped in G. Green.  Keeping it basic as there are beginners attending, and this way everyone could duplicate at home.

Hope you've all got a start on your Christmas cards, but if not and you live in the Fort McMurray area, contact me to come to a class to learn how.

If you live in Canada and would like to purchase these products check out my Stampin Up website HERE


Happy Stampin
Louise

Thursday, November 3, 2011

Glitzy Stocking Stamp A Stack

This card was so much fun to do, gotta love that Stocking Builder Punch!  Sure makes a project fast and easy to do and using the Silver Glimmer paper adds that festive touch.
On the natural white card base I stamped the Serene Snowflakes set with Baja Breeze ink.  I added a piece of Pocketfull of Posies dsp and a 2 1/2" circle punched from N.Q Navy cs and embossed with the Polka Dots ef.


If you live in Canada you can purchase these products on my Stampin Up Wesite HERE
Thanks for looking now go get a start on your Christmas cards.
Any questions about my cards or projects that I post please send me an email, I would love to hear from you and be glad to answer any questions.

Happy Stampin
~Louise

Wednesday, November 2, 2011

Framed Ornament Stamp A Stack

I did a Stamp a Stack last week and thought I would share the cards with you.  These were keep basic so that beginners could attend.
On these ones I used the same basic layout but 2 different DSP from the Holly Berry Bouquet DSP in the Holiday Mini


Please send me an email if you have any questions regarding these cards, or any of the items I post on my blog.

If you live in Canada you can order these product from my Stampin Up website HERE
Thanks for looking at my creations,
Happy Stampin
~Louise

Friday, October 28, 2011

Christmas Lodge

The Christmas Lodge set in the Holiday Mini is a great set to use if you'd like to keep
it simple and few layers.
For this card I stamped the Lodge in A.Artichoke ink and then masked it and stamped
the trees from the Plant Hope set also in A. Artichoke.
This is another pastel colored card using the B.Burgundy pastel and a q-tip to apply the pastel.
I used the 2 way glue pen to apply glue to the roof and where I wanted the look of
snow around the lodge then sprinkled the Dazzling diamonds glitter on top.
Love the sparkly crystal look it gives.

Please  send me an email with any questions you have or if you're interested in
coming to any of my classes in the Fort McMurray area.

If you live in Canada and would like to buy these products, please check out my
Stampin Up website HERE

Thanks for looking
Happy Stampin
~Louise

Thursday, October 27, 2011

Merry & Type on Christmas Collage

Have you started making your Christmas cards yet???  
Here is a fun one to do.  
So loving the Christmas Collage bg stamp, it can be used alone or layered with other images.
Here it is stamped with Versa Mark on v.vanilla cs and then colored with the pastels.
Using a cotton ball choose the color of pastels and rub over the stamped image.
By using the Versa Mark the pastels stick to the image and make it pop.
Then I stamped the Merry and Type ornament stamp on top with the c.cobbler craft ink
and embossed with clear embossing powder.  You could also just stamp the image
with the c.cobbler classic ink.
I also stamped the 25 in a.artichoke ink and punched out with the 1 3/4" circle punch
and die cut the a.artichoke cs using the circles #2 die and the 2" circle.
I distressed the edges of the stamped front and inked using a sponge and soft suede ink.
Mounted it onto a c.cobbler card.  The greeting is in the stamp set A Christmas Carol.

If you have any questions about anything I post on my site please send me an email.

If you live in Canada and would like to purchase these products, please check out my
Stampin Up website HERE


Thanks for looking
Happy Stampin
~Louise

Sunday, October 23, 2011

Holiday Stocking turned Elf Shoe

With lots of blogs posting the Holiday Stocking turned into a Witches Shoe, I decided to play with it to make an Elf Shoe.  Here's my result from playing.

I cut out 2 of the Stockings and 3" circle dies using g.green cs and glued the circle to the toe of the stocking shape to make a longer toe.   I cut down the leg of the stocking so that it looked more like the "elf shoe" and used the 1 3/4" circle punch to cut the shape to make the pointed toe.
I then put it thru the big shot using the square lattice ef then glued the 2 stockings together around the outside edge using mono glue, but not the top leg edge.  I cut 4 r.red scalloped triangle pieces using the Petite Pennants Builder punch and glued to the leg opening.  I punched holes in the top of the scallop piece with the Crop A Dial and attached the mini jingle bells with Bakers Twine.  This shoe can hold a couple treats stuffed down the leg.  Not much.... but fun to create.
Enjoy.  If you have any questions about it please shoot me an email.
If you live in Canada and would like to purchase the products to make this project please check out my Stampin Up website HERE

Thanks for Looking
Happy Stampin
~Louise

Friday, October 21, 2011

Punched Stitched Stocking

Christmas day is just 65 days away and I haven't started my cards to send to friends and family, but doing classes has keep me busy making lots of Christmas cards for clubs and stamp a stack.  

The Stitched Stocking set and the Stocking Builder Punch sure makes a great pair to help with getting started on some cards.  I've also used the Lace Ribbon Border punch to add a contrast color to the edge.  The new Silver glimmer paper and mini jingle bells add that extra touch of sparkle.  I've added a piece of Letters to Santa DSP for the background.
To order these products in Canada please check out my Stampin Up website HERE.
If you live in the Fort McMurray area and would like to come to a class or have any questions please phone or send me an email.
Thanks for looking.
Happy Stampin
~Louise

Thursday, October 13, 2011

Serene Snowflakes meets Snow Much Fun

Wow!! hard to believe that we're almost finished our second week of October....where does time go.
I've been playing with my Christmas stamps getting ready for classes and a Christmas stamp a stack.
Love these little snowmen in the set Snow Much Fun.
Here I stamped w.white craft ink and bajabreeze ink onto baja breeze cardstock and mounted it onto real red card.
Using my Big Shot (which you can get Free now if you sign up as a demonstrator under me) I die cut the snowflake and put glue on it and sprinkled with Dazzling Diamonds glitter.
Colored the hat and scarf with the baja breeze and real red and his nose with punpkin pie pastels.
After this was done I spritzed with the Smooch Vanilla Shimmer.
You can't pick that up on the photo, but it gives it a very soft shimmer.
To purchase these products in Canada please check out my Stampin Up website HERE.
If you live in the Fort McMurray area and would like to attend any of my classes, please contact me thru email or phone call.

For more details about getting a Free Big Shot or more info on my Stamp A Stack please go to my SU website  HERE, or send me an email.
Thanks for looking.

Happy Stampin
~Louise

Thursday, September 22, 2011

Greeting Card Kids Halloween

Love this idea of inking up the embossing folder to give your cs extra color.  This was a card we did in our September stampin clubs.  In this sample the EF is inked with versa mark and put thru the Big Shot, then Black embossing powder is put on and heat set.  For the class we used  B.Black classic ink and brayered it on the Vintage Wallpaper ef and ran it thru the Big Shot, (no embossing powder) and let it dry, or you can heat set.
I saw the idea of the spiders on this blog... it's just circles punched out and glued together.   The image is stamped onto Shimmery White cs using Black Stazon ink and used ink refills to watercolor the image using the Blender Pen.  The background card is Elegant Eggplant.
In Canada you can purchase SU products on my website HERE
Thanks for looking,
If you have questions please send me an email, I'd love to help.

Happy Stampin
Louise

Wednesday, September 21, 2011

Letters to Santa Mini Album

I've had fun playing... making an envelope mini album using the SU DSP Letters to Santa.  So now I'm ready to share the fun with you....so I'm doing a class using the same DSP.   The finished size is 4 1/2" x 6".
It'll make a great idea for Christmas gifts, or just have for your own display.


The cost for the class is $30.00, and will include

  • 1/2 pack of the Letters to Santa DSP page 186 in the IB&C
  • 1 anywhere glue stick
  • 2 chipboard covers
  • envelopes
For more info on date and supplies to bring, check out my SU calendar HERE
Thanks for visiting my blog today,
In Canada you can purchase these products  HERE

Happy Stampin
~Louise

Tuesday, September 20, 2011

Melon Mambo Flirtatious

This card was so fun to do....very girly!!!  
I saw the idea in blog world, not sure where, using the Blossom Petals Builder punch to make this tutu and decided to give it a try. 
I used the Flirtatious Specialty DSP, Melon Mambo and vellum for the skirt.
I did sponge the vellum with Pretty in Pink ink, but it doesn't show on the picture.  The bodice was made with the round tab punch using a retired DSP.  I die cut the Melon Mambo scallop circle, using the Big Shot.
Hope you're inspired to give it a try.
To purchase these products in Canada, go to my Stampin Up website HERE.
If you have any questions about anything I post on my blog please email me.
Thanks for looking,
Happy Stampin
~Louise

Monday, September 19, 2011

Vintage Wallpaper Anniversary

A very simple card for a wedding or anniversary.  I embossed the w.white cs with the Vintage Wallpaper EF and then lightly sponged over the details with crumb cake ink.  Doing this gives the embossed image more depth.  Added a soft suede cs panel under the w white cs strip which I punched the 2 long edges with the Scallop Trim Border punch.  Added some retired s.suede ribbon and stamped with soft suede ink.  The stamp set A Word for You is retired, but I like that set so decided to use it.

If you live in Canada you can purchase these products HERE on my Stampin Up website.
Any questions you have about my cards or Stampin Up you can email me.

Thanks for Looking
Happy Stampin
~Louise

Wednesday, September 7, 2011

Gently Falling 2 step

Another card using the Gently Falling stamp set.  This set can be used so many different ways.  With Fall on the way the leaves are starting to turn color and this looks like they've just fallen off the tree...well....almost!
Again I've used the Spice Cake DSP for added color.
Using the Big Shot I die cut the Top Note with River Rock CS then turned it and cut again the opposite way to make a square and then embossed.  Stamped the leaves outline with Soft Suede and did the solid stamping with Cajun Craze, More Mustard & Pear Pizzazz.  I cut out the leaves.

Check out the New Holiday Mini  to purchase the products I've used.

Recipe:
Cardstock:  Soft Suede, River Rock, V Vanilla, DSP First Edition, Spice Cake DSP
Ink:  Soft Suede, Cajun Craze, More Mustard, Pear Pizzazz.
Accessories:  Big Shot, Top Note die, Square Lattice EF, Scissors

If you have any questions please email me.

Thanks for looking.

Happy Stampin
~Louise

Tuesday, September 6, 2011

Gently Falling Spice Cake

This is my second card of the day....going for weeks without posting then doing 2 in a day.....what's up with me!!!  :o)  Just enjoying the new stuff!!!
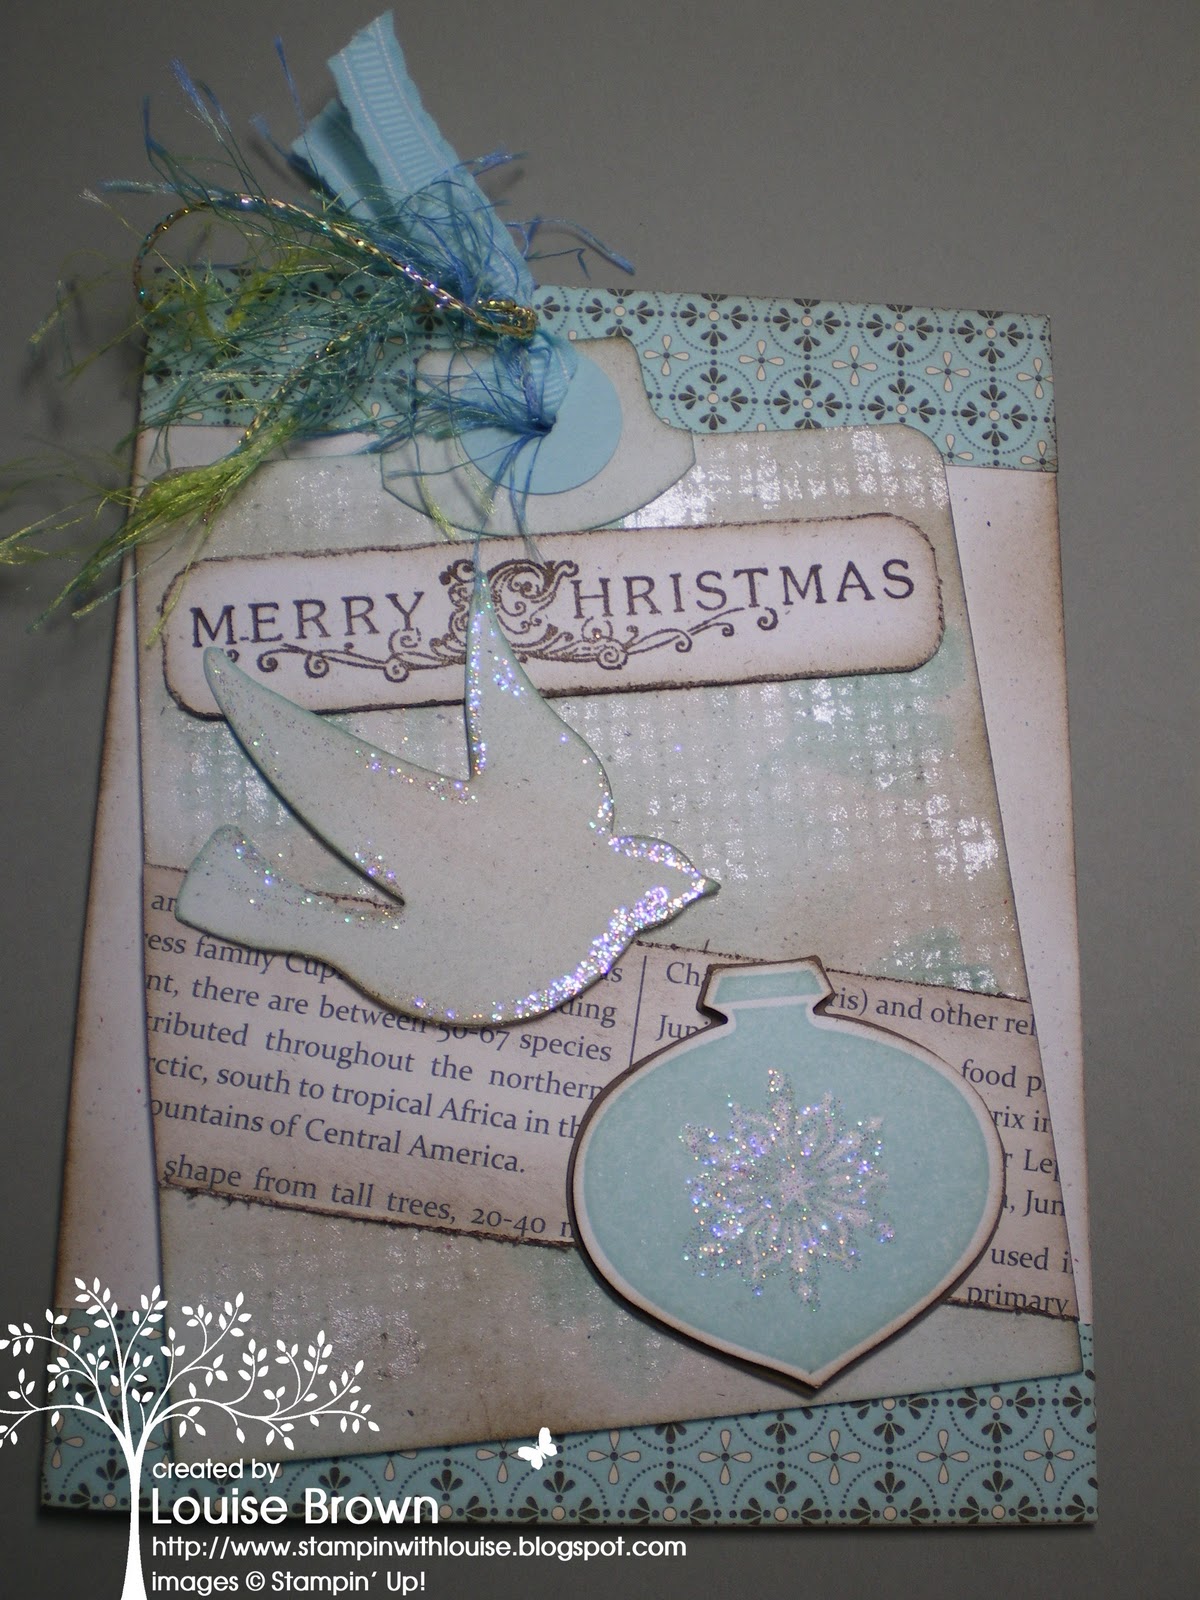
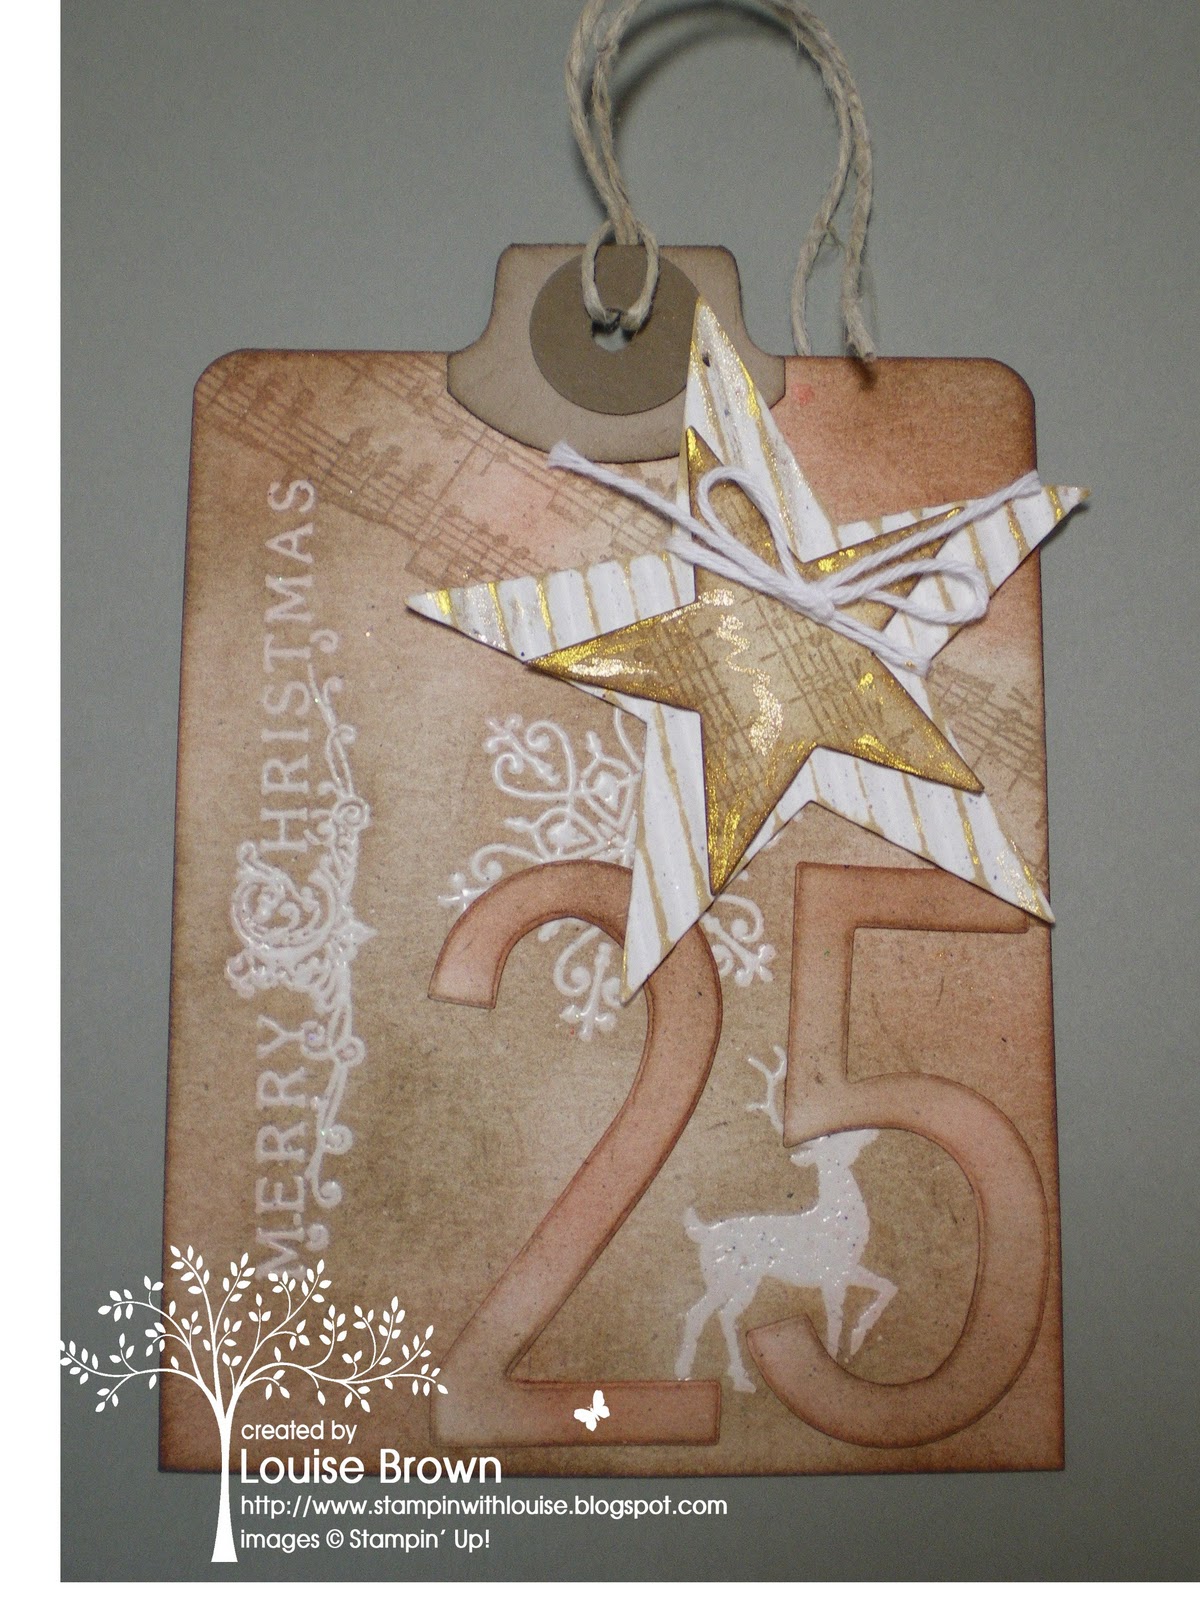
I'm so loving the new stamp set Gently Falling, in the new Holiday Mini.  
I've been playing with this all weekend and came up with a couple ideas that I really like.  
I also used the new embossing powder, Pewter, and the Spice Cake DSP, both from the Holiday Mini as well.


Same stamp set using the Spice Cake DSP, but looks so different with a different color cardstock.

The leaves were stamped with Versamark and embossed with the Pewter EP.
Sponged them with the same color inks as in the DSP, and cut them out.


Which color do you prefer???
To see these products, check out my Stampin Up website HERE.

Recipe:
Stamps:  Gently falling, Sincere Salutations
Cardstock:  Soft Suede, Pool Party, Pear Pizzazz, Naturals Ivory, V. Vanilla, Spice Cake DSP
Ink:  Soft Suede, Pool Party, Pear Pizzazz
Accessories:  Punches - Scallop Oval, Dotted Scallop Ribbon Border, Scissors, Paper Trimmer,BIG SHOT and Oval Die.

Any questions please don't hesitate to email me, I'd love to hear from you.
Let me know what you think.

Thanks for looking,
Happy Stampin
~Louise

Cased Upsy Daisy

We are getting sunny warm weather here in Northern Alberta.  Still hard to be inside stamping when we know the winter is coming.  But I did take time to play when I saw this card.

This is a total case from Me My Stamps and I.  I really like this set and the colors she used.  
She kinda made a monster outta me you could say!  I just had to do other colors for fun.  There are so many color combos that one could use for this.  Here are the ones I chose.  Hope you like.


I didn't add sentiments to all of them, but will do as I need a card.

The 1st color combo 
Naturals White, E. Espresso, Island Indigo, Pool Party, Baja Breeze.

2nd combo 
Naturals White, Wisteria Wonder, Perfect Plum, Concord Crush.

3rd combo,
Naturals White, Soft Suede, Peach Parfait, Calypso Coral, Poppy Parade.

Thanks for stopping by, now go give this idea a try!

Happy Stampin
~Louise


Wednesday, August 10, 2011

Hello, Doily ink resist

Thanks for looking today...
I've been playing with some of my new stamps and really enjoyed the Hello, Doily bg stamp.  I saw the Card Patterns Sketch 127 and decided to give it a try.  Hope you like my creation.  

All SU products.
Stamps:  Hello Doily, French Foilage
Cardstock:   Island Indigo, Pool Party, N.White, W.White, and dsp Island Indigo
Ink:  W.White Pigment, Island Indigo
Accessories:  White EP, Basic Pearls, Baja Breeze Seam Binding Ribbon, Perfect Details Texturz Plate, Big Shot, Destressing Tool

All supplies can be found on my SU website here

Have fun creating
Happy Stampin
Louise


Friday, July 15, 2011

Pink Pirouette Ice Cream

With the hot weather we love to have ice cream....so why not make an ice cream card!!!....which really makes me want to have an ice cream cone.
Using a brayer, I inked the new Stripes embossing folder with Choc Chip ink and put a piece of V. Vanilla cs inside and embossed, leaving a Choc Chip stripped background on the V.Vanilla for the ice cream to sit on.
I used the new Perfect Pennants Bigs Die to cut the cone and embossed it in the square Lattice embossing folder to make the waffle look, then inked with a sponge and S. Suede ink for extra texture.
The Pink Pirouette ribbon is retired, but I really thought it went with the stripped background.

To purchase Stampin Up products in Canada, please check out my SU website HERE.

Thanks for Looking
Happy Stampin
~Louise

Sunday, July 3, 2011

Hello Ink Resist

The new Stampin Up catalog is full of new ideas.  If you don't have a copy take a look HERE  to see all the new goodies.
On this card I've used  a new set called My Friend, and En Francais BG.  Stamped the leaves with VersaMark pad and added clear embossing powder and heat set.  Stamped En Francais with a new in color calypso coral (2nd generation) over the embossed leaves.  I inked over the front with all new in colors, Pool Party, Calypso Coral, Lucky Limeade, & Island Indigo, then stamped Hello with Island Indigo.  I love the look of embossed resist.  The card is made with Island Indigo cardstock.
If you live in the Fort McMurray area and would like to learn some of these techniques, I'd love to have you attend one of my classes.  Please contact me thru my email or phone #.
Thanks for looking, and let me know what you think.

Happy Stampin
~Louise

Friday, July 1, 2011

Snow Much Fun

If you don't have a new Stampin Up catalog, you can take a look at it online HERE.  If you live in the Fort McMurray area and would like a copy please contact me thru my  Stampin Up website HERE.
This is one of the new Christmas sets called Snow Much Fun.  These snowmen are just so cute.  For the background cardstock I used Baja Breeze and stamped with Serene Snowflakes set using the Versamark and Whisper White pads.  Stamped the snowman unto W.White cs with E.Espresso ink, colored using Stampin Write Markers, and inked the edges with Baja Breeze.   Layered the snowman image unto Cherry Cobbler.  Put glue with the 2 Way glue pen over the snowman and sprinkled with dazzling diamonds glitter.
Thanks for looking, please leave me a comment.

Happy Stampin
Louise

Tuesday, June 21, 2011

Summer Splash

Had to give the new In Color card stock a go and used Pool Party.  Colored the surf boards from Summer Splash with assorted Stampin Write Markers and sunk them into some Crumb Cake sand!!  The "sand" and "sky" were embossed with Perfect Polka Dots embossing folder.
Made the sun using the 1 3/4" Scallop Circle and 1 3/8" Circle punches.  Die cut the stars, also stamped the shells from the Summer Splash set in crumb cake on white cs and cut out.  Wrapped and tied the white Bakers Twine around the crumb cake cs and attached to the card.

To purchase these products check out my Stampin Up Website HERE.

You can order the new colors from the new Catalogue starting July 1st @ noon.

Thanks for looking.
Happy stampin
Louise

Thursday, June 16, 2011

Purse-onally Lattice

Summer is here and I've been busy enjoying the great weather we`ve been getting, so not much stamping going on!  Going to have to start playing with some of the new goodies that have arrived at my door this past week. 
I did take time to create a quick card using the Round Tab punch and circle punches to make purses for the front.  Used the In Colors - Pear Pizzazz, Blushing Bride, & Poppy Parade with Early Espresso.  Embossed  the purse with the square lattice EF and added a pearl to the purse flap.  Die cut a scallop circle and Lattice to add some dimension.  Added some Poppy Parade, and Pear Pizzazz DSP for background.  Left the scallop circle blank and will add sentiment on top when needed.

To find these products please check out my Stampin Up website HERE.

Be sure to take a look at all the products that are being retired...click here to view the items

Thanks for looking

Happy Stampin
~Louise

Saturday, May 21, 2011

Happy Birthday Awash with Flowers

Spending way too much time outside in this beautiful weather we've been getting, so that's why I've been so tardy in posting!!!  Lots of weeds to eliminate and pruning to do on the shrubs and trees.  We have such a long winter that when the good weather comes I just want to stay outside.

I did this card to show how the Awash with Flowers stamp set can be used so differently.  The card is Soft Suede, the Whisper White layer is stamped with En Francais bg stamp using Pink Pirouette, and inked around the edges.   I used Pink Pirouette for the solid petal and outlined with Soft Suede.  Did 6 and cut them out, then attached the centers with a glue dot.  Punched Pear Pizzazz leaves using the Blossoms Petals Punch and used a stylus to mark veins in them.  Used some Pear Pizzazz seam binding (to gather - pull a couple strands in the center).  The Pink Pirouette ribbon is retired.
To glam it up I used my 2 way glue pen and dazzling diamonds glitter on the petals, then added a pearl to each center.

To purchase these products go to my Stampin Up website HERE
If you have any questions please email me.

I'd love to hear your comments,
Happy Stampin
Louise

Friday, May 6, 2011

Awash with flowers


I've been enjoying some of this spring weather, and haven't been posting much here over the past week.
These are the cards we're doing in our stamp clubs this month.
Using the in colors, sure makes for some bright spring looking cards.

If you live in Canada you can purchase these products on my website HERE
The new Summer Mini is now available, so be sure to check out all the new goodies.

I'd love to here what you think of the in colors this year and have you been using them.
If you have any questions or want more details please leave me a comment or email me.

Thanks for looking at my Creations,
Happy Stampin
~Louise

Sunday, May 1, 2011

Because I care Finial Press

This is a simple card using the level 1 Hostess set, Because I Care.  BG layer is Marina Mist put thru Big Shot in the Finial Press EF.  Image is stamped on W.White in Not Quite Navy ink and layered on Not Q.Navy mat punched with the Scallop Edge Border punch.  So Saffron borders punched with the Dotted Scallop Ribbon Border punch layered on top.  The sentiment is Sincere Salutations then punched with Designer Label punch.
Thanks for Looking
To purchase these products, check out my Stampin Up website HERE

Happy Stampin
Louise
  

Tuesday, April 26, 2011

Whimsy Friends 24 - 7

I really like Friends 24-7 stamp set.  Here I used it layered on top of the Whimsy wheel background.  This was another card we did at stamp camp last week.  Rich Razzleberry was used for the card base and mat and the border and other mat was done in Old Olive.  Image was stamped on W.White.  The sentiment is from Teeny Tiny Wishes.  This set of sentiments should be in everyones stamp room!!!  

To purchase these products please check out my Stampin Up website HERE

Thanks for looking
happy stampin
~Louise

Friday, April 22, 2011

Lovely as a Tree Masculine

Lovely as a tree was used for the masculine cards we did at Stamp Camp.  The one card was done in Cherry Cobbler, Night of Navy and Old Olive.  The other was stamped in Soft Suede on Very Vanilla and layered on Cajun Craze.  The DSP is First Edition in the Occasions mini that expires on April 30th.  The background is B. Black.  Both the Cherry Cobbler and B.Black backgrounds were embossed with the Square Lattice EF.

To purchase the products in Canada go to my Stampin Up website HERE

Thanks for Looking
Happy Stampin
~Louise

Wednesday, April 20, 2011

Mother's Day Elements of Style

Continuing with the Stamp Camp cards.  This is the Mother's Day card we did.  Stamped the Image with Crumb Cake ink on w.white cs.  Cut the top note frame, embossed it with the sq lattice ef and layered on top of stamped image piece.  Used the Stampin Pastels in P.in Pink to color the flowers and River Rock for the leaves.  Applied daz diamonds glitter with the 2 way glue pen to some of the flowers.  Added extra bling with rhinestones.  The card base is pink pirouette.

To order these products, go to my website HERE.

Thanks for looking
Happy Stampin
~Louise

Tuesday, April 19, 2011

Just Believe Pear Pizzazz

Another one of the cards done at Stamp Camp.  Pear Pizzazz dsp, and Regal Rose cs, with the stamped image layered on Choc Chip cs.  I diecut the butterflies using the Beautiful Wings embosslit die.

To purchase these products or contact me, check out my Stampin Up website HERE.

Thanks for looking
Happy Stampin
Louise